
Microsoft Flight Simulator delivers on a big promise, letting you explore nearly every inch of Earth from the skies.
If you’re a newcomer to the flight simulator genre eager to take off and see the sights, that may not be so easy at first. It’s worth mastering a few basics early on.
Polygon’s Microsoft Flight Simulator beginner’s guide will give you the foundations you need to soar. Before you explore the air around everything there is to see, check out these essential tips on flying, navigating, and controlling the camera.
Complete the Flight Training first
Microsoft Flight Simulator is, unsurprisingly, a realistic flight simulator. Unlike an arcade flying game, there’s a lot you need to know before you can even take off properly. Everything you need to know to take off into the sky, stay up there, and land safely is explained in detail in the Flight Training section.
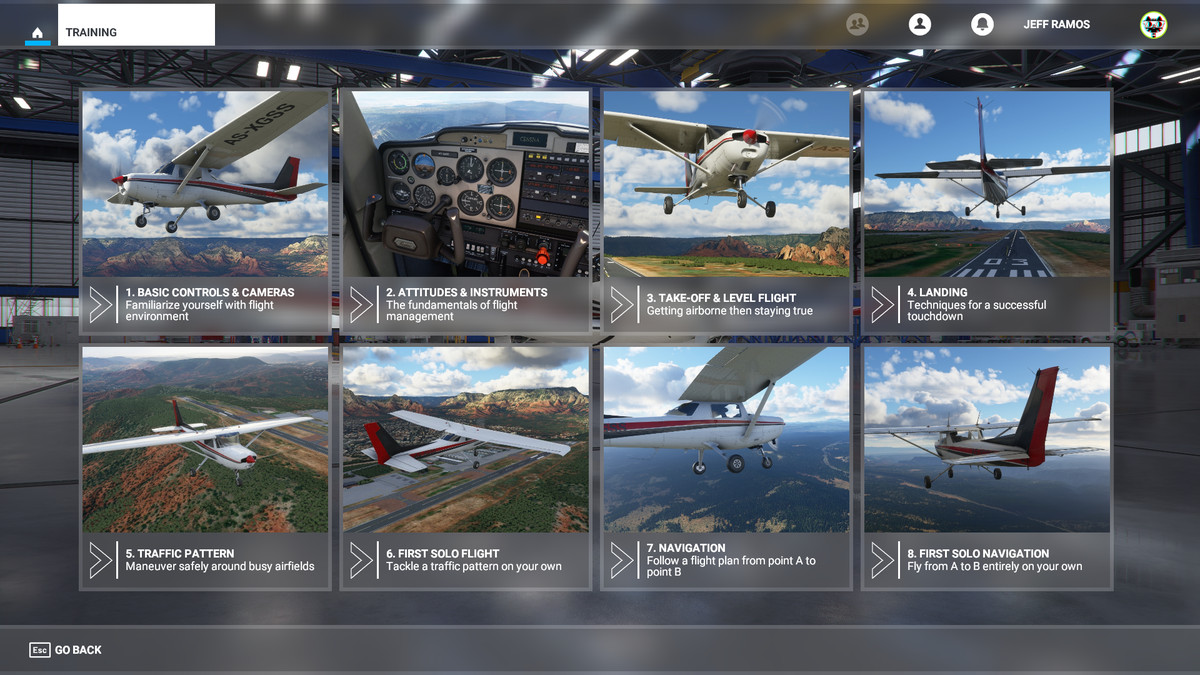
While it’s hardly exciting to recommend that everyone dive into training mode first thing, it’s essential. Flight Training covers nearly every concept worth knowing, and it’s designed to get you up in the sky as fast as possible. At the same time, it explains a handful of controls that might not be intuitive, especially if you’re planning on playing this game with a controller. These eight and short exercises will familiarize you with basic controls, navigation, and landing.
Completing Flight Training takes roughly 30-40 minutes, and by the time you’re done, you should feel confident enough to fly around the world on your own.
Which planes to use
In Flight Training, you’ll exclusively use the Cessna 152, which has a cruise speed of 107 KTAS (knots true airspeed). As you’ve learned in your lessons, that speed range is fairly good for cruising around a small area. If you want to cover more ground, you’ll need a faster plane.
In this section, we’ll discuss the types of planes in Microsoft Flight Simulator, and give you some ideas about when and why you might want to use them.
Propeller planes
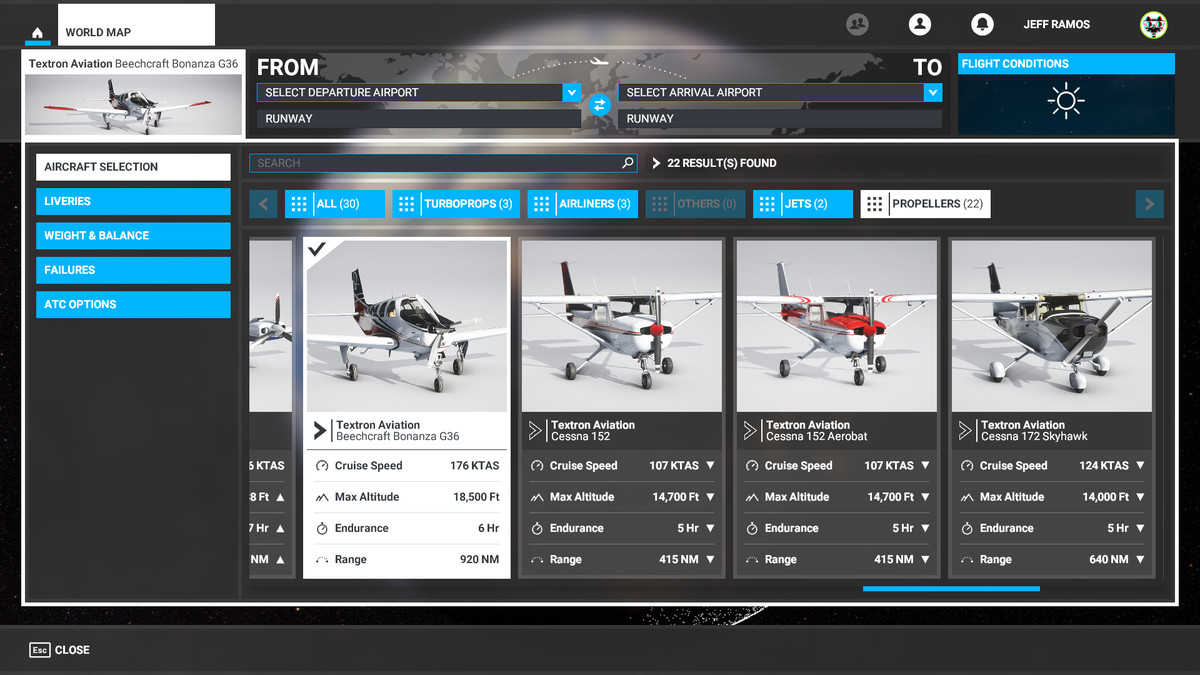
Image: Asobo Studio/Microsoft Corporation via Polygon
Propeller planes like the Cessna 152 are great for flying low and relatively slow. If you plan on sightseeing around dense areas like cities or trying to find where you live, pick a propeller plane with a cruise speed of less than 150 KTAS.
Turboprops
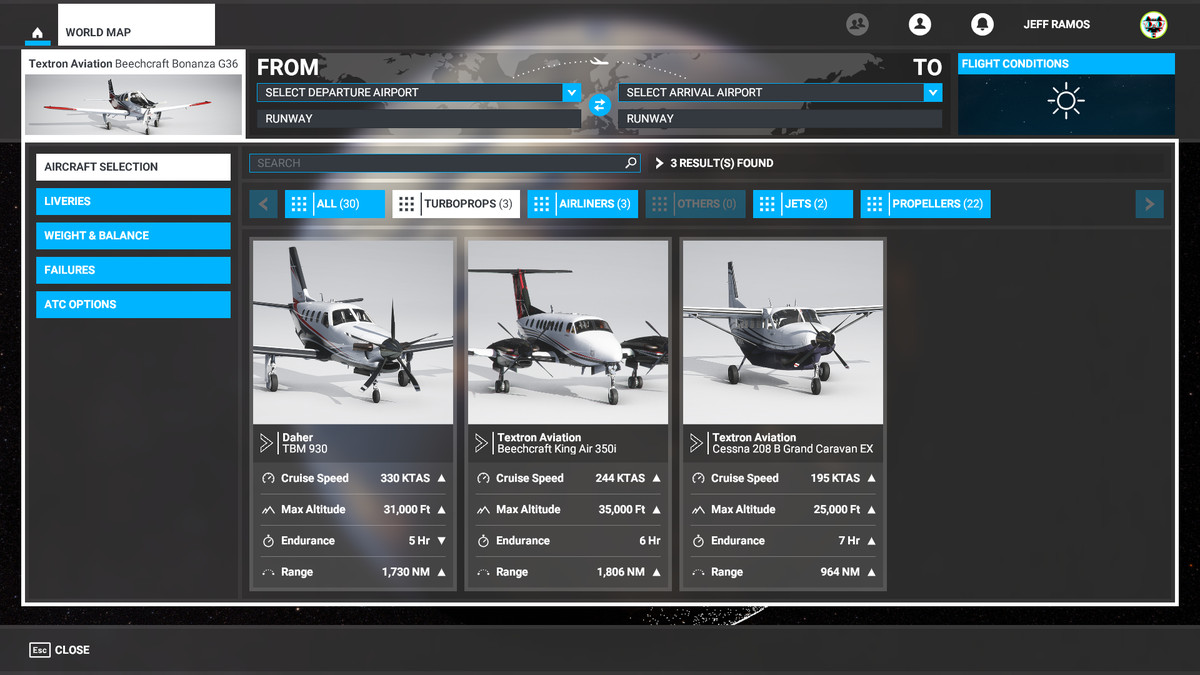
Image: Asobo Studio/Microsoft Corporation via Polygon
Turboprops are similar to propeller planes, but they’re twice as fast and have double the maximum altitude. These are good planes to move up to after you’ve gotten comfortable with propeller planes. They’re also a good fit when you want something faster, like when going over larger stretches of land like mountains, large forests, or big lakes.
Airliners and jets
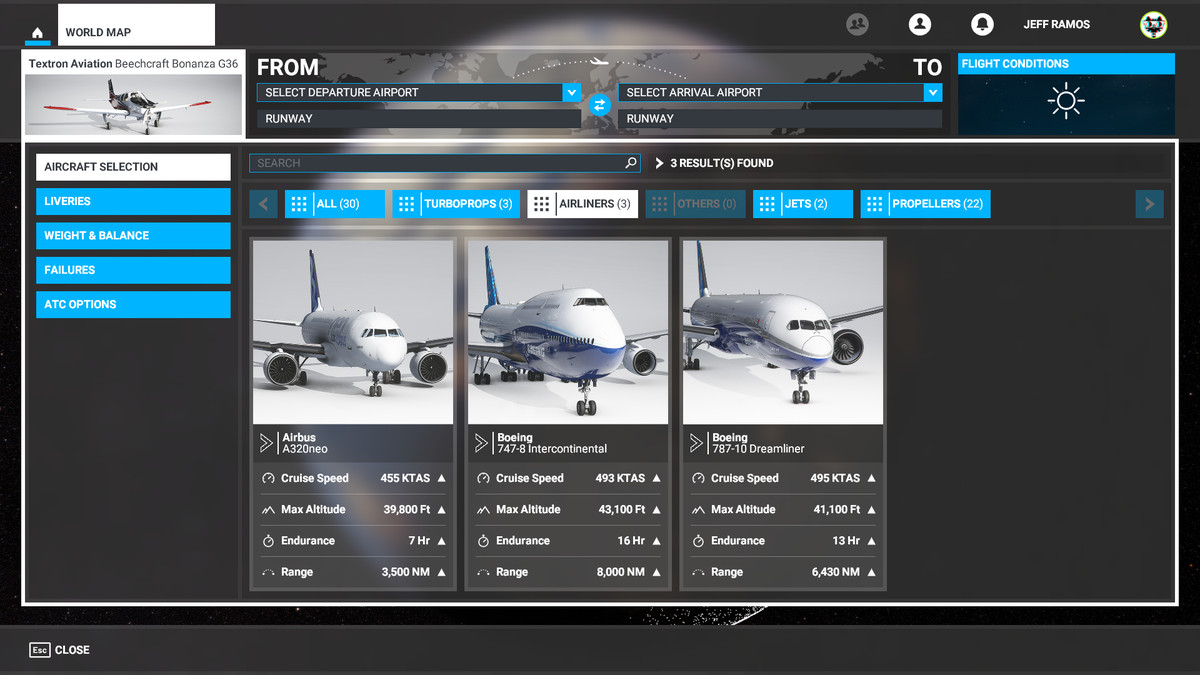
Image: Asobo Studio/Microsoft Corporation via Polygon
To cover longer distances, consider stepping into an airliner or jet. Both options have quadruple the airspeed of the plane you learned the basics on and can climb to more than three times the altitude. Both options have comparable speed but handle differently due to their size. Some airliners have much larger fuel reserves, in case you feel like simulating an intercontinental flight from the comfort of your home computer.
How to fly anywhere
One of the most exciting aspects of Microsoft Flight Simulator is the ability to fly anywhere in the world. Setting off to the skies above some of the world’s most beautiful sights — or even your home — is simple, but there are a few things worth knowing first.
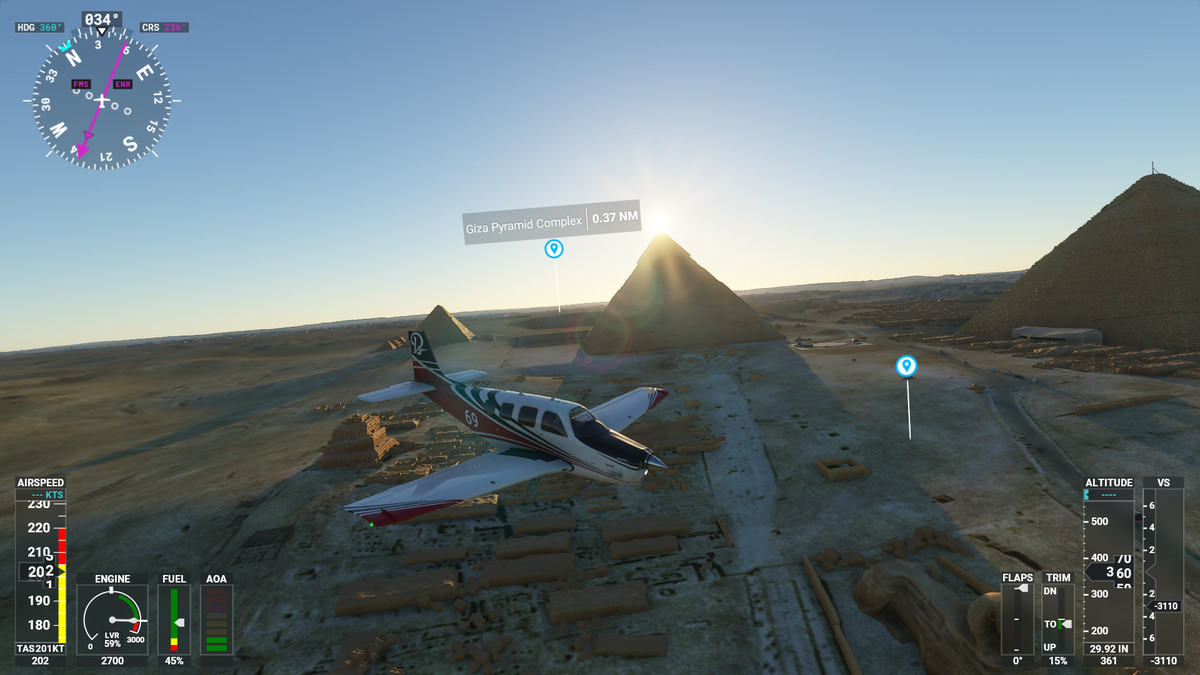
Most of the world’s major landmarks are called Points of Interest. If your goal is to check out famous places or natural wonders, then all you need to do is search for them in the World Map / Free Flight mode.
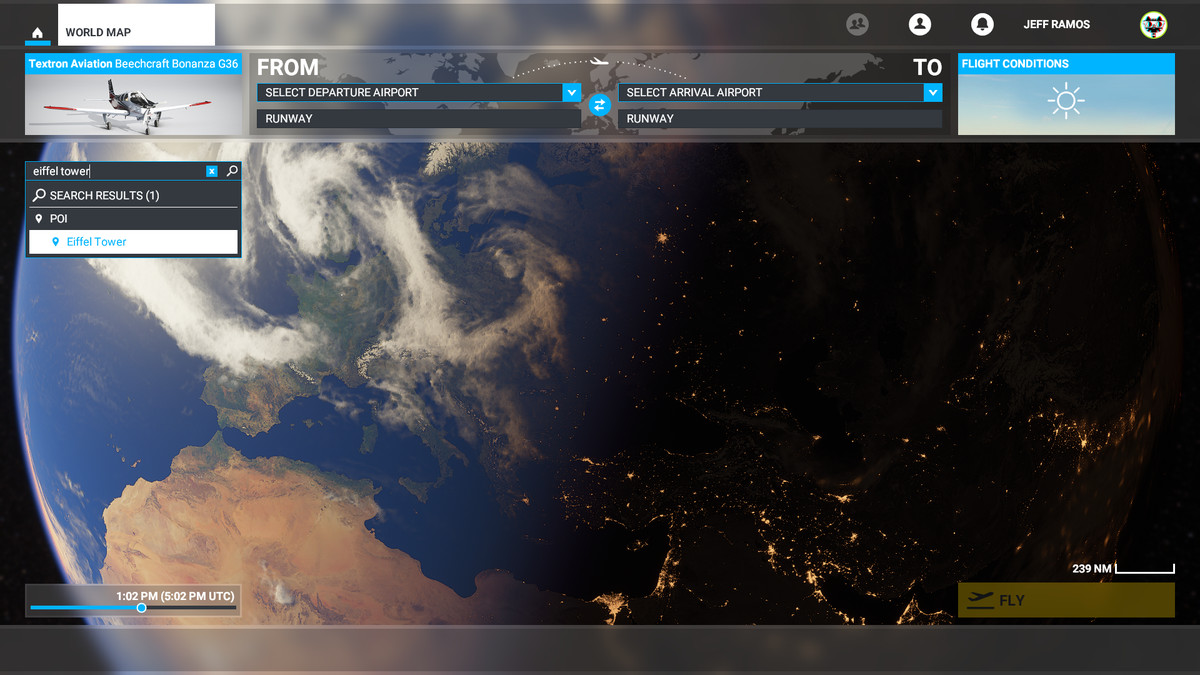
Image: Asobo Studio/Microsoft Corporation via Polygon
If your destination is a famous landmark, you can easily find it by using the search function from the map screen in Free Flight mode. Once you’ve found your location, the map will zoom in on it, allowing you to set it as a departure point or arrival area. In our guide to finding famous landmarks, we recommend setting Points of Interest as arrival points and locating a suitable departure airport.
To see how your house has been modeled, check out our guide on finding where you live in Microsoft Flight Simulator.
How to use Active Pause
Active Pause is a feature that you might have seen recommend on a loading screen, but it’s not bound to any key, so you might not know how to use it.
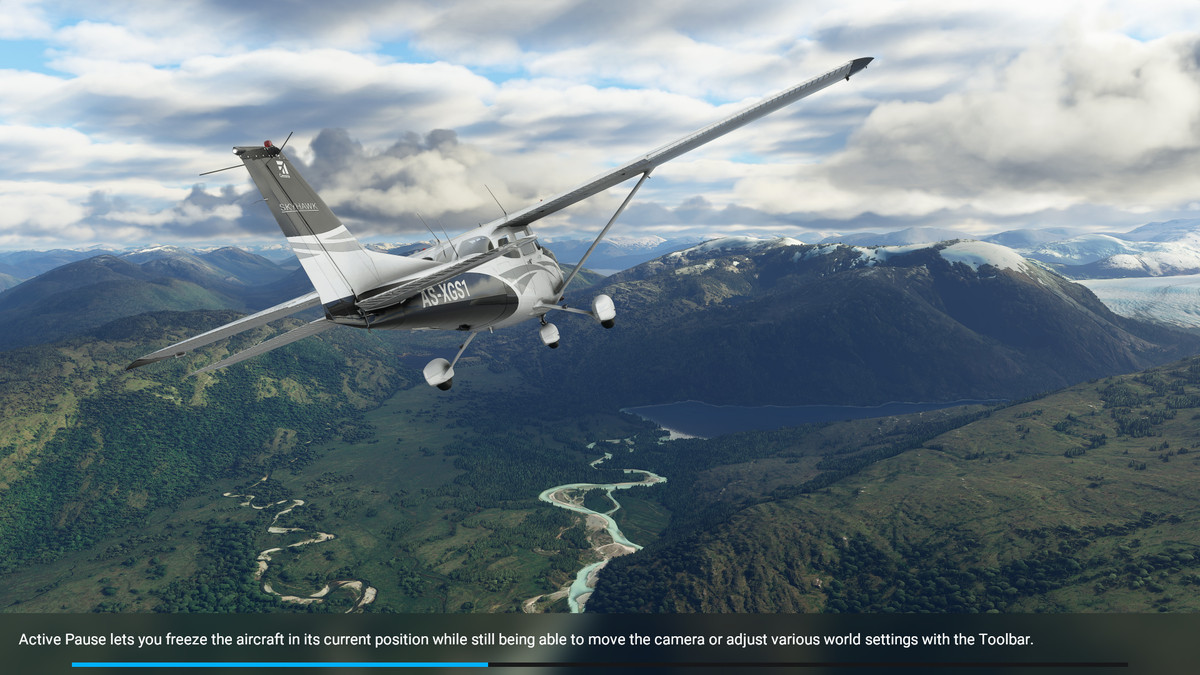
Image: Asobo Studio/Microsoft Corporation via Polygon
Active Pause allows you to stop the motion of your aircraft and look around. Hitting the normal pause menu by pressing the Escape key on your keyboard or pause on your controller brings up your options, obscuring everything else. However, if you want to stop the action and take a look around, you need to bind your Active Pause function to a key.
The Control key works well, because the game doesn’t use it, and it’s at the bottom of your keyboard, which makes it quick and easy to access.
We staged the shot above using Active Pause. With the function enabled, we orientated the external camera (by hitting the View button our Xbox One controller) and set the position of the sun at the right height by changing the weather settings in the toolbar.
This feature is also a great if you’re trying to find your house and you need to take a moment to look around to locate it.
Have fun with the ATC options
Before you set off for your flights, be sure to check out the ATC Options. Changing these air traffic control settings won’t have a major impact on your flight, but they’ll allow you to have a little fun with the radio messages you hear while flying.
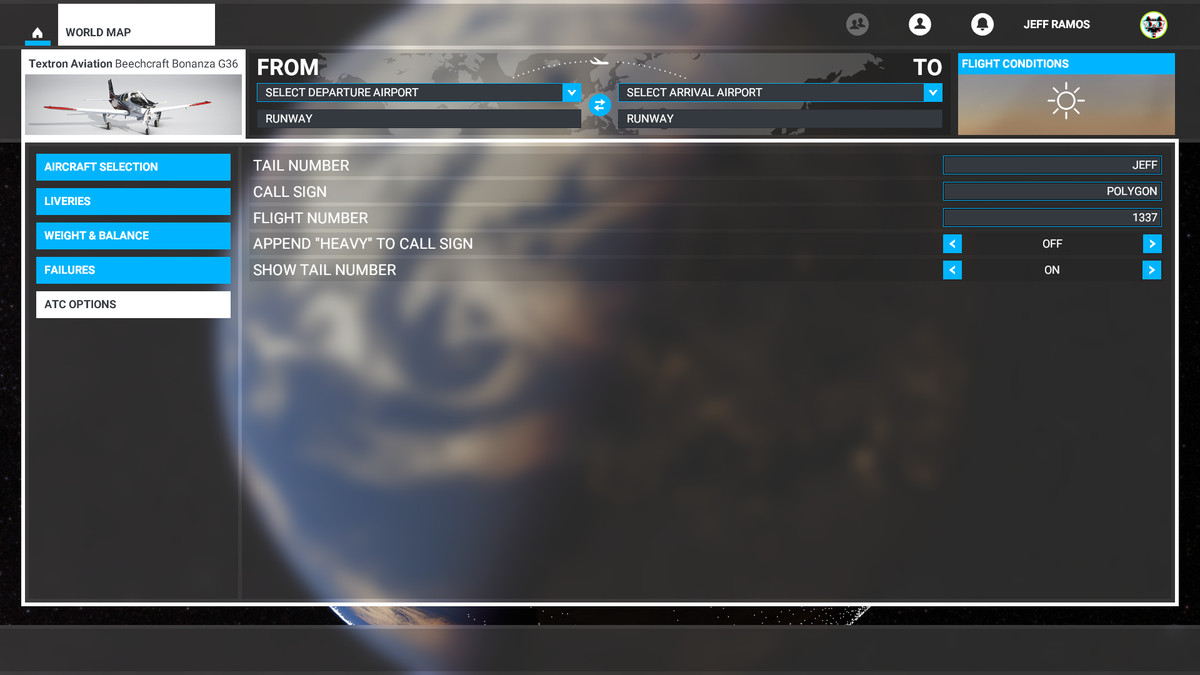
Image: Asobo Studio/Microsoft Corporation via Polygon
Whatever you write in as your tail number will appear on the back of your plane. You can add a few letters or numbers here. This makes no real difference, but it’s nice seeing your name or favorite numbers plastered on the side of your plane.
Your call sign is usually a set of identifying characters that the air traffic control team will use to identify you over the radio. Any letters you use in your call sign will be called out using the Phonetic Alphabet, but if you write in a short word, there’s a chance they will say that instead. Short names and words work great, though we found that profane language gets replaced with a generic call sign.

Sally Morgan is a contributor at Sproutwired.com, covering a broad range of topics including news, politics, business, technology, sport, entertainment, and lifestyle. She focuses on delivering clear, balanced reporting and practical information that helps readers stay informed about current events and emerging developments. Sally is committed to presenting stories in an accessible and engaging way, with an emphasis on accuracy, relevance, and issues that matter to everyday readers across Australia and beyond.


