
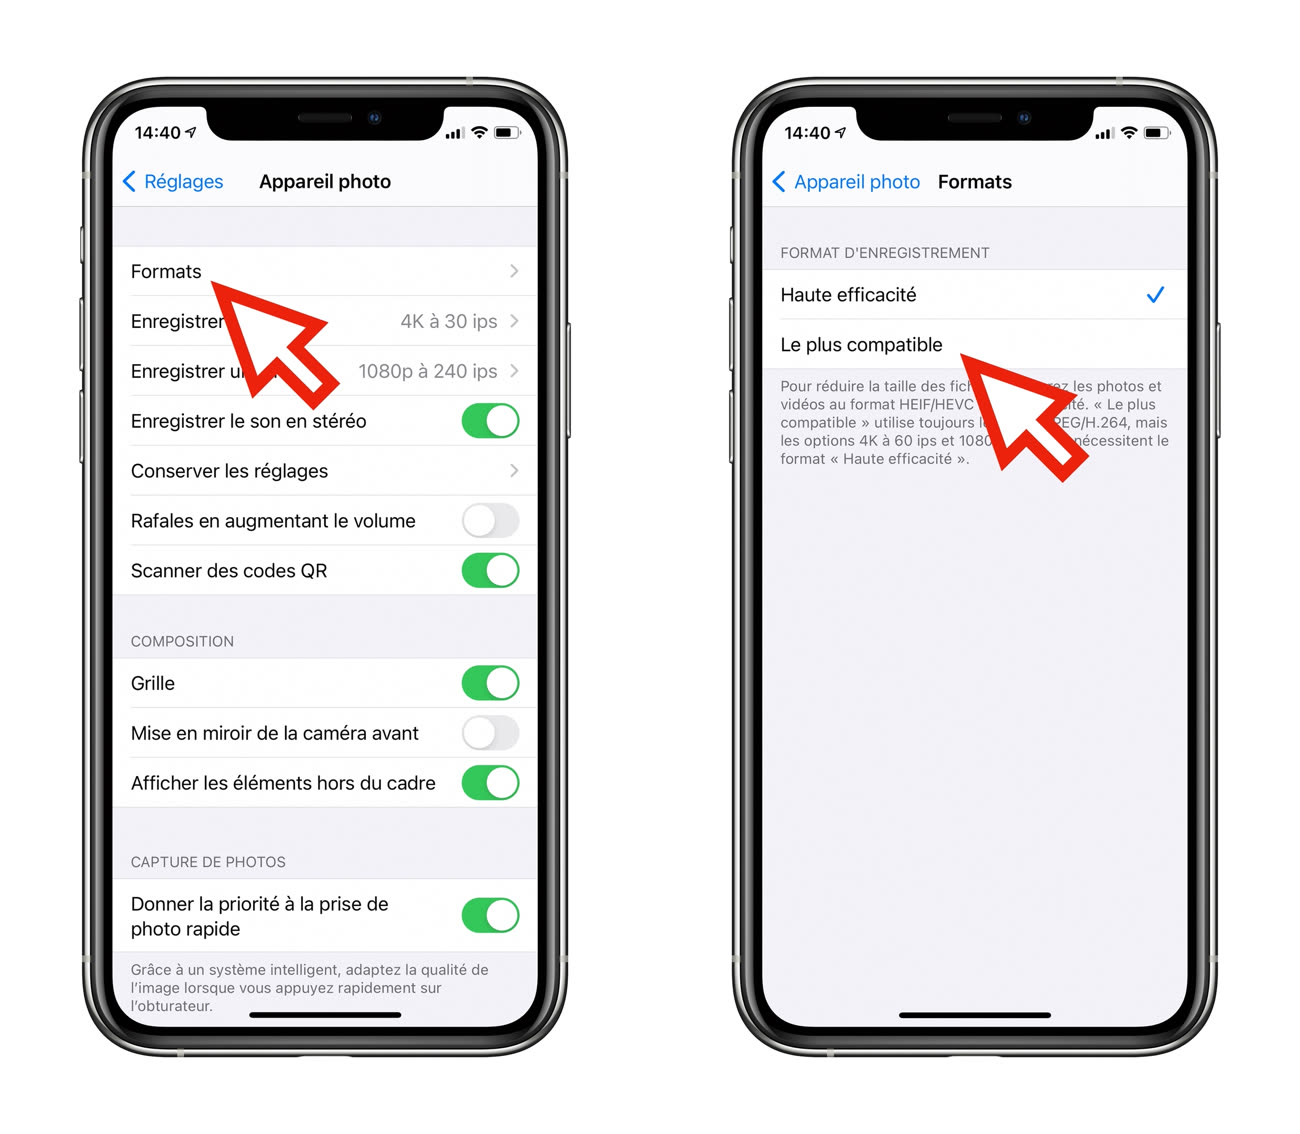
In recent years, Apple has used a new format for recording pictures taken by the iPhone and iPad: HEIF, to High Efficiency Image Format. This format was not invented by Apple, but rather by a group of experts Moving Picture Expert GroupFamous creators of MPEG video format. Apple is the first brand to make it its default format, which does not go away without causing a few interruptions here and there.
To avoid these small compatibility issues, we can certainly force the iPhone to continue using the JPEG format, by checking the “Most compatible” box in the camera’s “Format” settings. But it would be a shame to deprive ourselves of a more modern and more efficient format, as some sites or some applications have not yet attempted to adapt.
So for these recalculated recipients, we allow you, in a few simple steps, a function to convert one or more HEIF files to JPEG with a simple right-click from Finder. It will also be an opportunity for those who have not yet tasted it, to try the famous automaker software which is a gold mine for repetitive tasks.

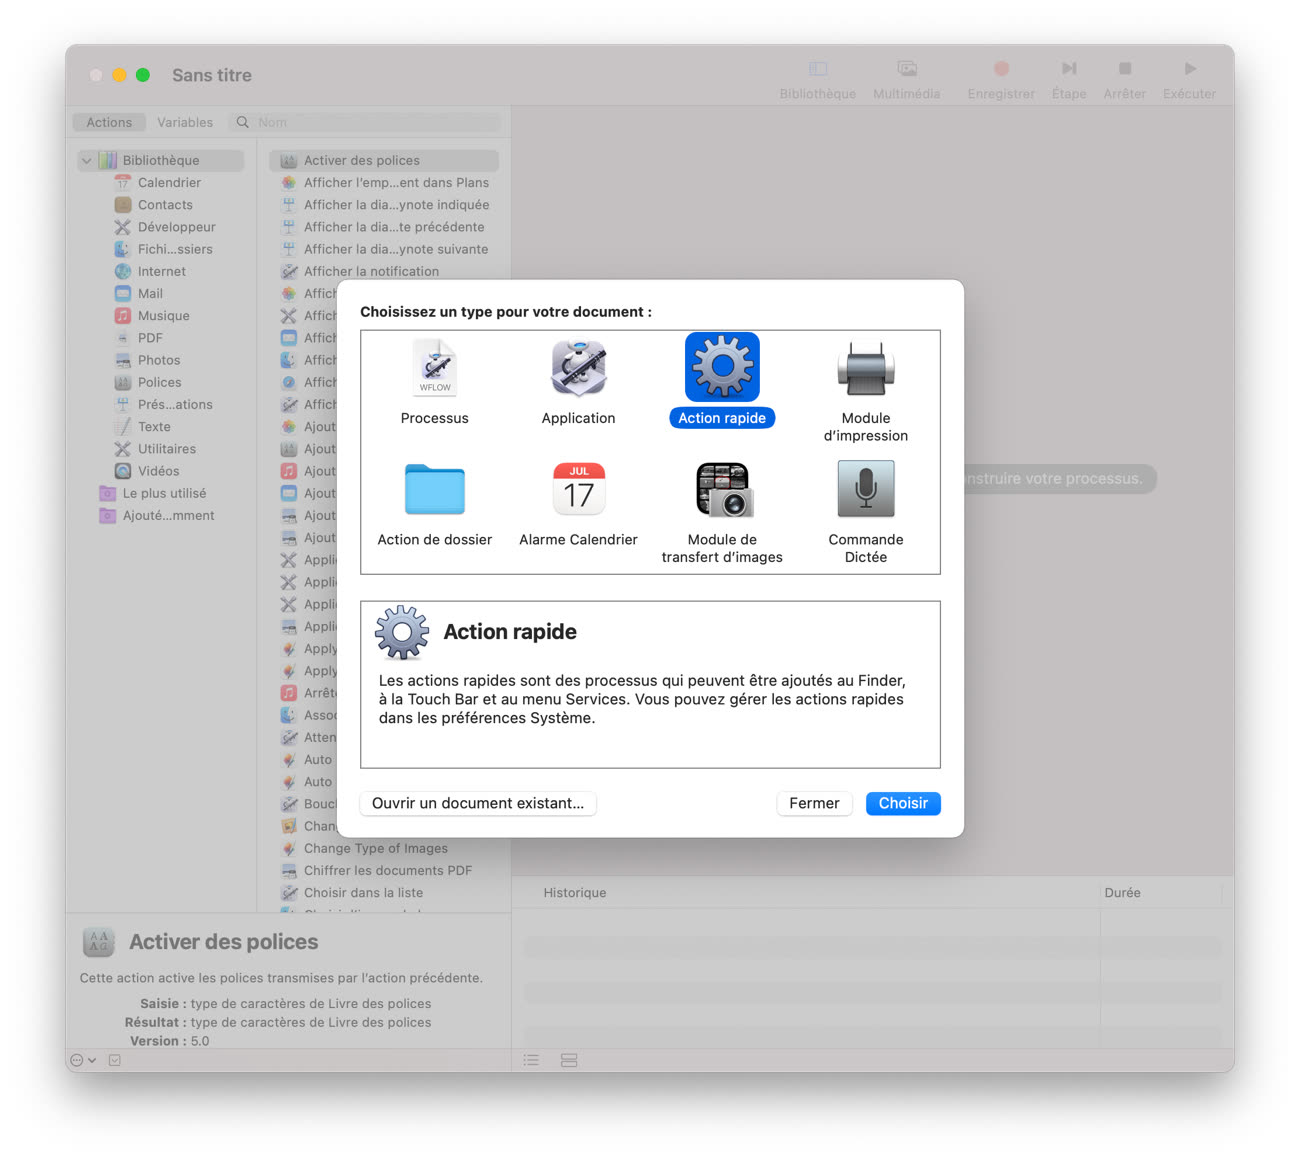
And this is exactly what we are going to start in Automator. This application is located … in the “Applications” folder, of course. Launch it and create a new document. Of the options given by the application, “quick action” is of the type: this is the one we are going to choose.
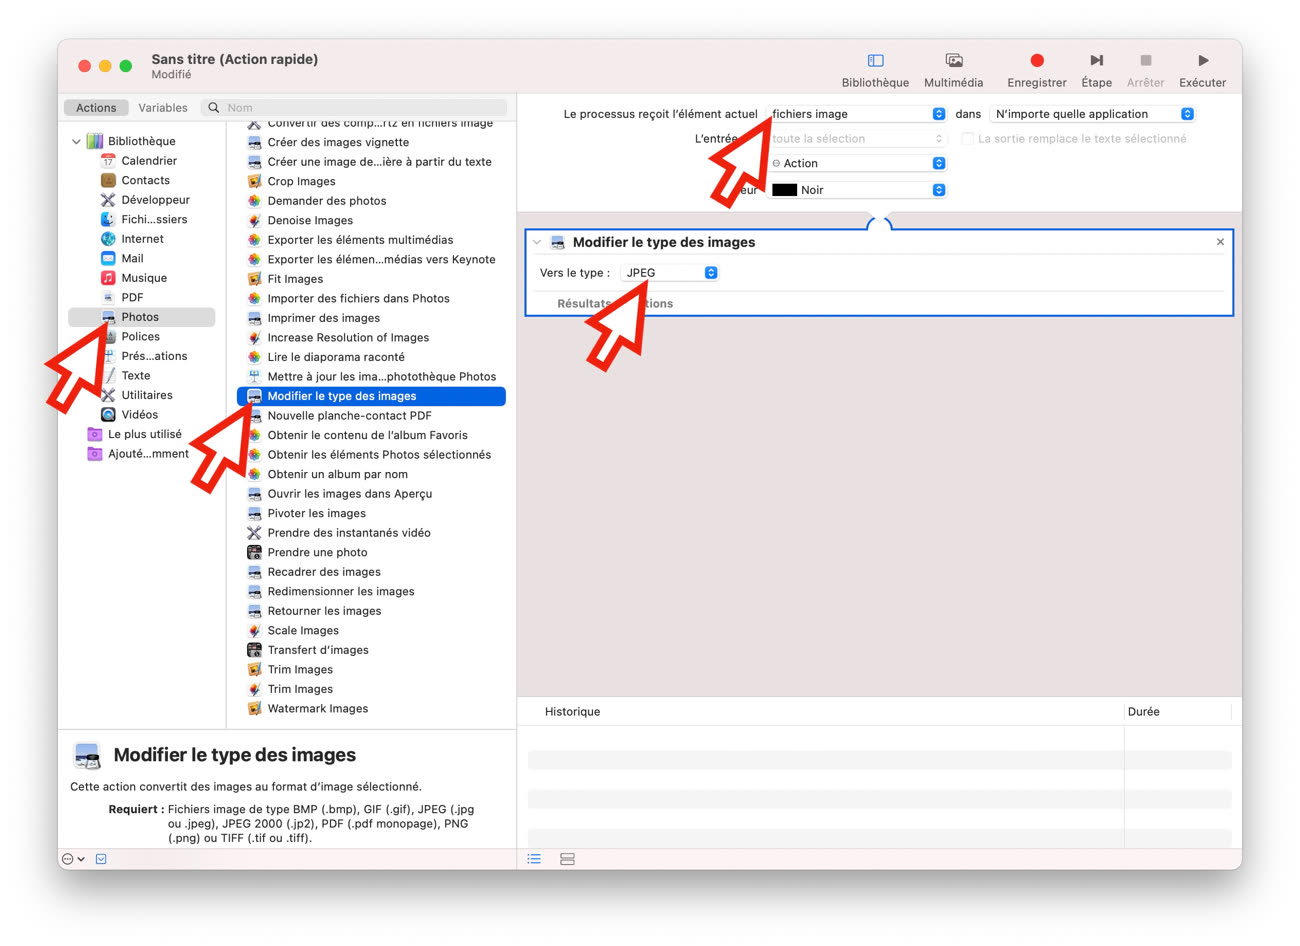
At the top of the window, specify that “the process receives the current item: in image files: any application”. This will prevent your action from attempting to apply it to anything other than images. Then, in the list of programs in the library (at the farthest left), select Photos, and drag the “Change image types” action from the second column to the area to the right.
Automator will undoubtedly suggest that you automatically add a copy function to keep the original: it’s up to you what you like! For my part, using this action only to edit photos retrieved by AirDrop from the iPhone, I know that the original is safe on the phone, so I did not add the copy action.
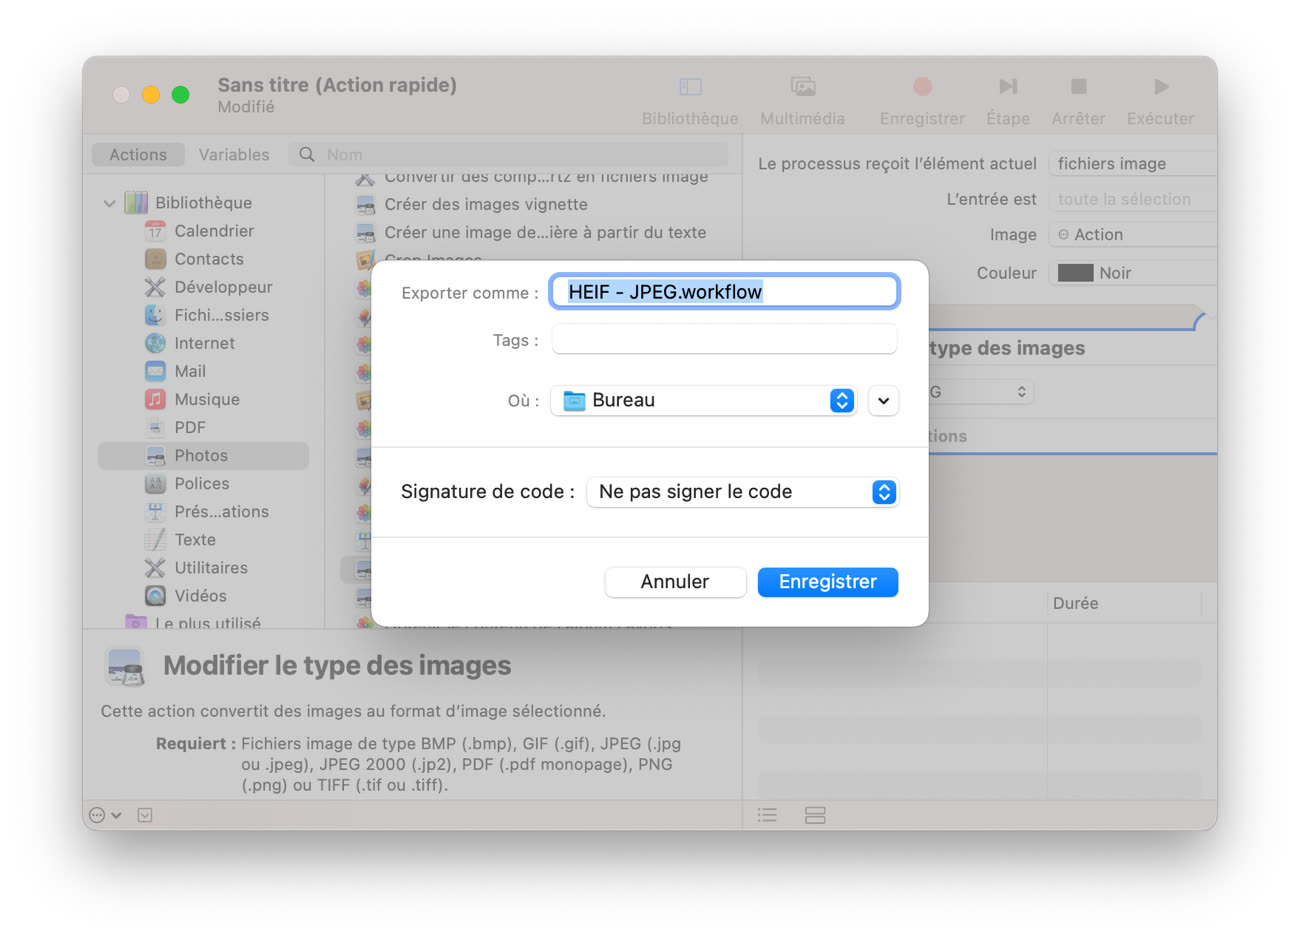
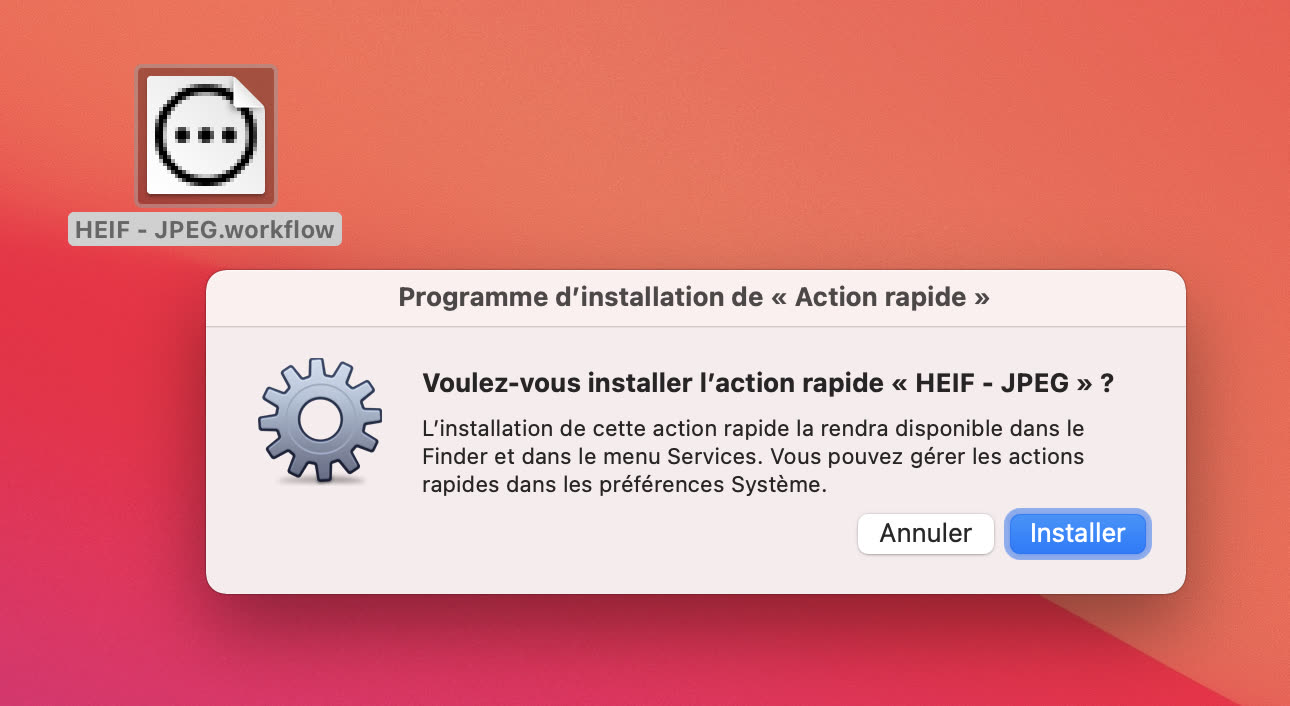
We will now have to export this small process to make it available in Finder. It is in the menu “File> Export” that this happens. Give it a simple name like “HEIF – JPEG” and save it on the desktop. You can leave Automator (no need to save your program, unless you want to change it later).
All you have to do is double-click on the action entered on your Mac’s desktop. The system will offer to install it for you: Click “Install” and accept. As Apple corrects things, your workflow file will disappear from the desktop at the same time.
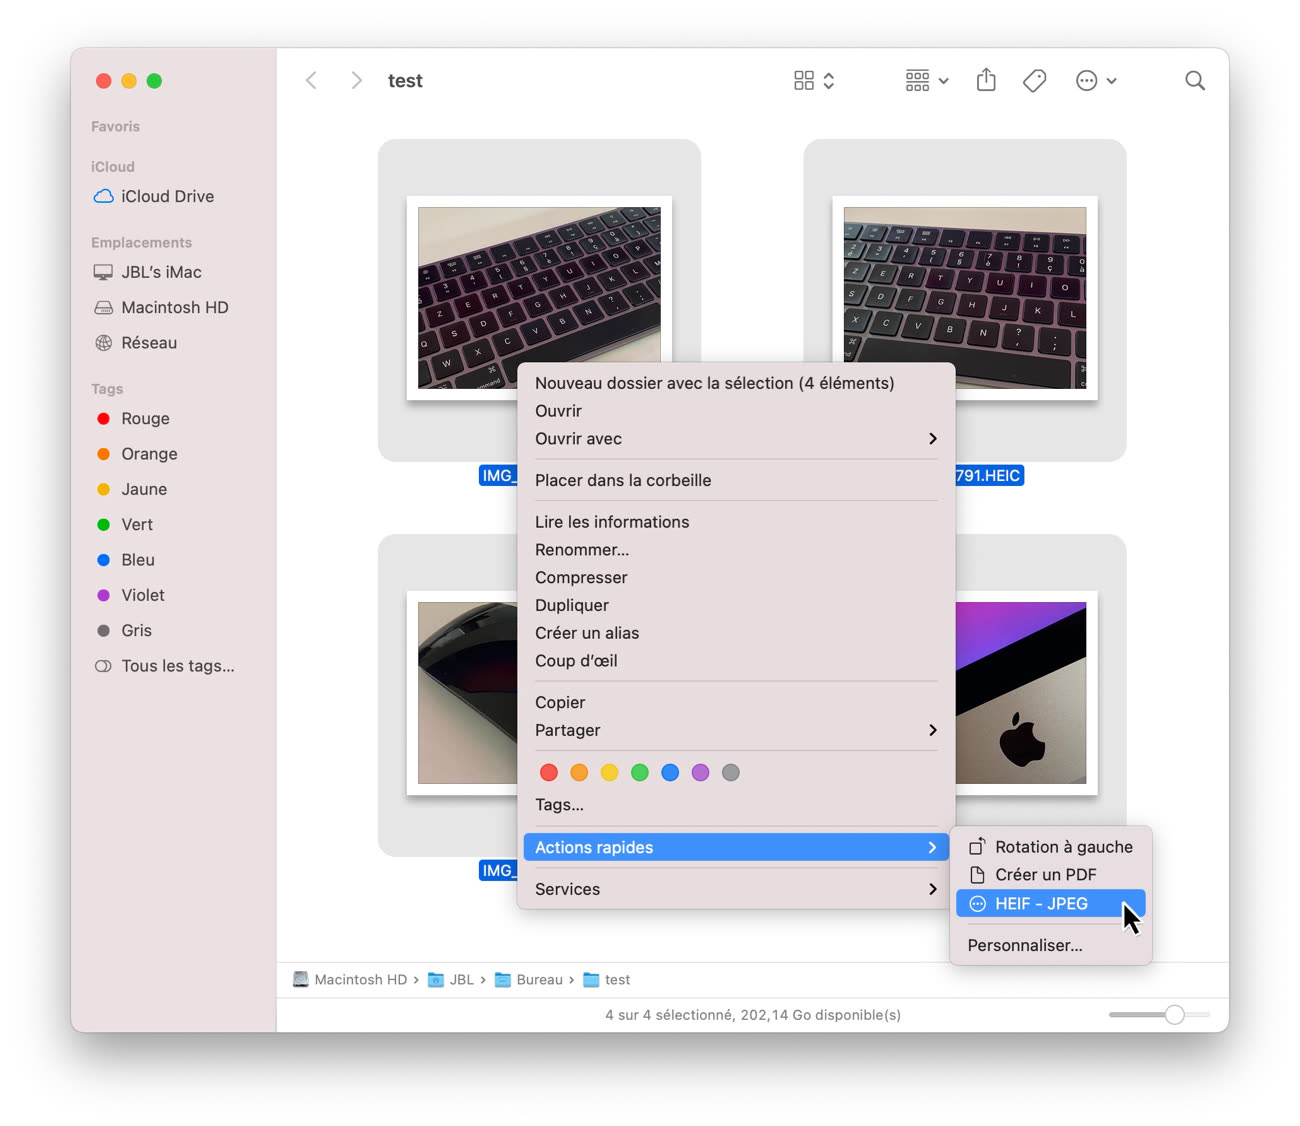
And now, facing a HEIF file (or any other image readable by Mac), you can right-click your “HEIF – JPEG” action to convert the file to a more compatible format. It is possible to select multiple images at once.
We hope you find this tip useful, and why not? – It makes you want to know more about all the automation functions that allow us to get the most out of our devices: Automator on Mac and shortcuts on iOS. For which Nicolas Ferno offers as thick as a charmer at our shop.

Sally Morgan is a contributor at Sproutwired.com, covering a broad range of topics including news, politics, business, technology, sport, entertainment, and lifestyle. She focuses on delivering clear, balanced reporting and practical information that helps readers stay informed about current events and emerging developments. Sally is committed to presenting stories in an accessible and engaging way, with an emphasis on accuracy, relevance, and issues that matter to everyday readers across Australia and beyond.


